Do I need an Oscilloscope?

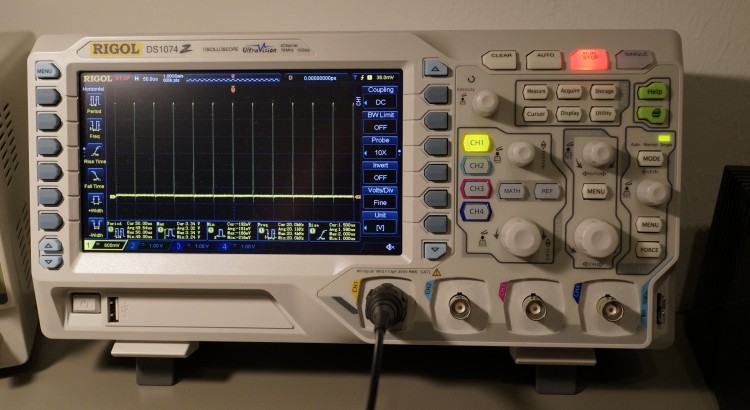
If you are interested in Electronics, you will likely ask yourself sooner or later if you need an oscilloscope and especially what to buy if you have decided to do so. As I have been in the same situation a few months ago I likely know what’s going on in your head. Give me a minute to save you a few more sleepless nights thinking about this topic.

You can find a lot of infos about scopes. You will find hundreds of hours of video reviews of scopes, just look at the amazing EEVBlog. But non if these videos really gave me an answer to my question: Do I actually need a scope and what can I do with it.

Did you love playing with your dads HIFI-system and turning the knobs? Well, I know a scope is kind of a sexy tool with it’s knobs for you… But do you really need one? (more…)

Read More

Compiling Qt 4.8.5 for Arietta G25

Arietta G25

On my way building an automated wireless home automation system I have been finally been drawn to Embedded Linux. It just makes sense. Driving Internet of Things devices based on Arduino or other directly programmed MCUs is not very efficient. You will have so much work with just building up a network stack for example based around a CC3000 (Available as a nice breakout board from Adafruit). And you will just redevelop what is available for linux for decades. But: Embedded Linux is a beast of a monster. It’s just a whole different universe.

There are so many devices to choose from, the most prominent example being the Raspberry Pi of course. But I wanted a solution that I can use for a final product. For my work I need a very small device and I don’t need all these connectors (Ethernet, HDMI, etc) so I have been searching the large catalog of SoMs (System on Module) and found “Arietta G25” by Acmesystems. I really love this little device and Acmesystems provides a lot of tutorials and help documents to get started quickly.

Find more infos about their great product line-up here: acmesystems.it.

After I had attached a 3.5 TFT (acmesystems has a well written tutorial on how to do that) I wanted to use it for a great User Interface. As you don’t want to build your own UI-System you will most likely find Qt. Qt is more than just a UI frameworks. It’s awesome as it features more or less the same as the whole Apple iOS system. It features it’s own (great) IDE, Interface-Builder for doing design work the WYSIWYG way and features an almost complete Framework with hundreds of C++ classes for all kinds of stuff. They even have a well written network stack helping a lot in doing IoT stuff.

But: Getting Qt to run on an embedded linux device is not that easy. It’s hard work. Requires hours of hours of your time building stuff. Of course there are systems like Yocto and Buildroot – I just got started with them and so far I don’t see it’s easier. As acme systems provides a few images to get started, I wanted Qt installed based on the acme systems solution.

(more…)

Read More

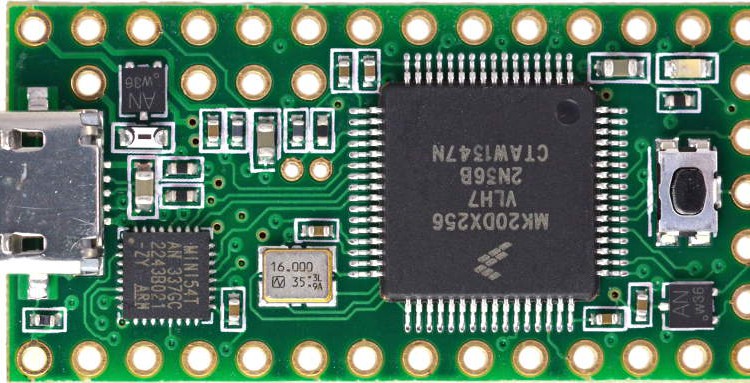
Teensy – Arduino on Steroids

I love the Arduino Eco-System. Although I do not really like the IDE, the whole system is awesome. And it allows to quickly prototype ideas. And, as everything is Open Hardware, it also allows you to build your own PCBs with the same components used by Arduino. I am not in the business for creating a large-scale electronics product. But it’s very important for me that I could.

While working on my DIY Home Automation System I noticed some limitations with the current Arduino Hardware Offers. I have created my own Atmel 328p based PCB for my sensor nodes. The Atmel 328p is the MCU that drives Arduino Uno, Nano, Micro Pro, Sparkfuns Redboard and various other Prototype Systems. This MCU is quite fast (up to 20 MHz), can be run on batteries for a long time (if you care about your current consumption) and is easy to use program with the Arduino IDE. But there are limitations. You only get about 2K SRAM and 32K of program memory. That is enough for devices that only connect to a few sensors, driving a few motors, etc. But it’s not enough for more complex projects.

My DIY Home Automation Network needs a hub, that acts as a bridge between the Internet and the sensor nodes. Sensor Nodes are using nRF24L01+ Radio Modules. The Hub also hosts such a radio module, but has to send the signals in to the cloud. Although I wanted to have nice devices in the end I tried an Arduino Yun as a hub. The hub does not have to be very pretty as it will be placed in a small room that is not exposed. A small enclosure will do it. Arduino Yun is a great device that hosts both an Arduino MCU and a full-fledged Linux on the same device, connected with a bridge. Using the bridge you can run shell commands from the Arduino MCU on the Linux side and receive the results. You do not have to build a whole HTTP-client, as Linux already has one. I have written a small tutorial about that: Running Node.js on Arduino Yun.

All of that worked fine – in the lab. Using the sensor networks in the wild (well, in my house), I found it very difficult to debug the system. In order to save power the nodes do not have any LEDs, Display, whatever. I added some LEDs to the Arduino Yun that showed it’s state and if sensor data came in. But all in all it did not really help. I found sensor data in the cloud, but not from all nodes. And I could not really see the routing in the nRF24L01+ network. Attaching displays to the sensor nodes has not been an option due to power restrictions. I had to add a display to the hub. That would give me the option of adding some sort of user interface to it. But Arduino Yun only has 2K SRAM, and adding a display and it’s quite large driver code I ended up with not enough SRAM left. I could optimize everything so it perhaps would fit, but I would not have any room to add a UI to the hub later on. I have been quite disappointed about this limitation. I think the Yun should have built with a beefier Arduino-MCU. It should be possible to drive a display trough the bridge from the Linux side, but that would be way to slow. Although I really liked the idea of the Yun, it did not fit my needs.

Teensy is here to help

Searching for an Arduino Compatible small device Google with tell you to have a closer look at: Teensy. Teensy is just an amazing piece of hardware, created by Paul J Stoffregen. Paul did an amazing job with Teensy, especially the latest version 3.1. Teensy ist very small. If you find an Arduino Nano or Micro Pro small, you will be amazed how small Teensy really is. And it’s very, very powerful. Teensy features an ARM Cortext MPU with 64 KB SRAM and 256 KB Program memory. That is a lot of space and enough to do a lot of cool stuff. What I really love about the Teensy is how bootloading it is solved. I had a few issues with programming Arduinos. Teensy features a tiny uploader software, that is either triggered by the Arduino IDE or by pressing the reset button on the device. And uploading new code always worked. I really love that. Just install the Teensy Hardware Plugin in your Arduino IDE 1.0.x (it does not support 1.5.x at the moment) and you are good to go.

(more…)

Read More
Custom LCD Controller for Printrbot Simple (Metal)

In order to print with the Printrbot Simple Metal you have to connect your computer with your printer via USB and make sure that the computer continuously sends data to the printer. If your computer crashes, your printer stops and your maybe long hour print is a piece of chunk. If your computer goes into stand by the result is the same. And there are various other reasons like energy consumption. The way to go is untethered printing.

The Printrbot Simple Metal is capable of that in two ways, both of them require a Mini-SD card inserted into the printer. The first way is to write the G-Codes generated by your Slicer, typically Repetier Host and Slicr to the SD-Card. Name it auto0.gcode, insert the card into the printer. Shut it down and on again. The printer should now start to print. But you will not know if it works for a couple of minutes as it’s first heating up. Nothing moves, etc. I tried that a couple of times and found the procedure to be very annoying.

The second method is using the Addon LCD Controller sold by Printrbot.

Getting your hands on a LCD Controller

Your Printrbot is already capable of displaying a nice LCD-Menu with all kinds of options and the option to browse the SD-card and run any print from it untethered from your PC. All that is needed is a Standard 20×4 LCD Display and a rotary encoder. A rotary encoder is a special kind of input sensor that sends signals when it is rotated.

Printrbot sells these LCDs for $65 in their store. But they still have that wood look. It does not match the Metals Design. And, as I am living in Germany you will have to wait a few days for it to arrive and you will likely have some issues regarding customs. I did not found a german distributor a few weeks ago so I wanted to built my own. A few days ago I have found 3ddinge.de selling the LCD Controller in Germany for €70. That’s a lot of money and by doing it yourself you will end up with 30-40 Euros for the LCD Controller.

(more…)

Read More

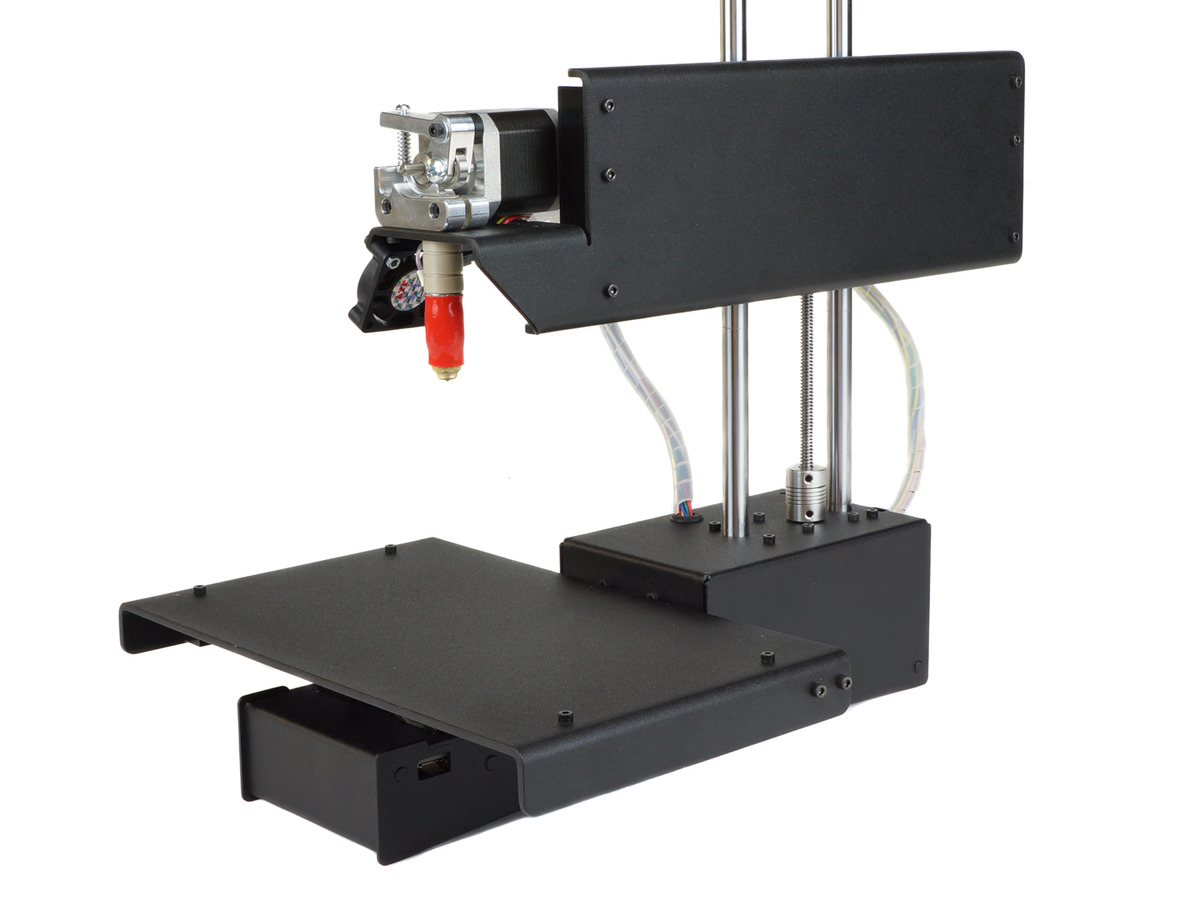
Getting started with Printrbot Simple Metal

Printrbot Simple Metal Black

My DIY-Wireless-Home-Automation-System requires various nodes to be placed around our house. Having kids and a wife, there is no way around building nice looking enclosing for my stuff. So I decided to invest into a 3D printer. It took me some time browsing the web to find what I was looking for. I really want good quality prints. And as my primary interest is electronics and not 3D printing, I wanted a machine that runs out of the box and does not need a lot of preparation before each print and various reprints until you have printed a piece that is ok.

As I did not want to spent too much money on a 3D printer I bought a Printrbot Simple Metal. As you browse the web you read a lot of very good things about this tiny (well, not really) machine. And I tell you the same. This machine is really very, very good. But there is a major fault with it: It’s not plug and play. But it’s so close! The software is good, and the hardware is very, very good, too. Even the Getting Started Guides on Printrbots Website is quite good I think. But there are some minor Bugs that prevent a hassle free start – well in my case, and as you are reading this I think you have problems, too.

I must admit that I purchased the assembled one. If you are having problems your job is harder as you could have built something wrong. Either way, perhaps you did everything correctly and now you are running into the same issues that you will have even with an assembled one.

What I really do not understand is that there are so many comments and forum posts with people running in the same problems over and over and it all comes down to faulty getting started guides and other minor documentation bugs. And they have not been updated till now. But I am here to help!

Here is my own getting started guide. But I will not write down every little step. Instead I will give links and will comment on the bugs, issues and solutions I have found while following the official guides.

(more…)

Read More

A DIY cloud centered, iOS controlled, Arduino based Home Automation System – Part 1

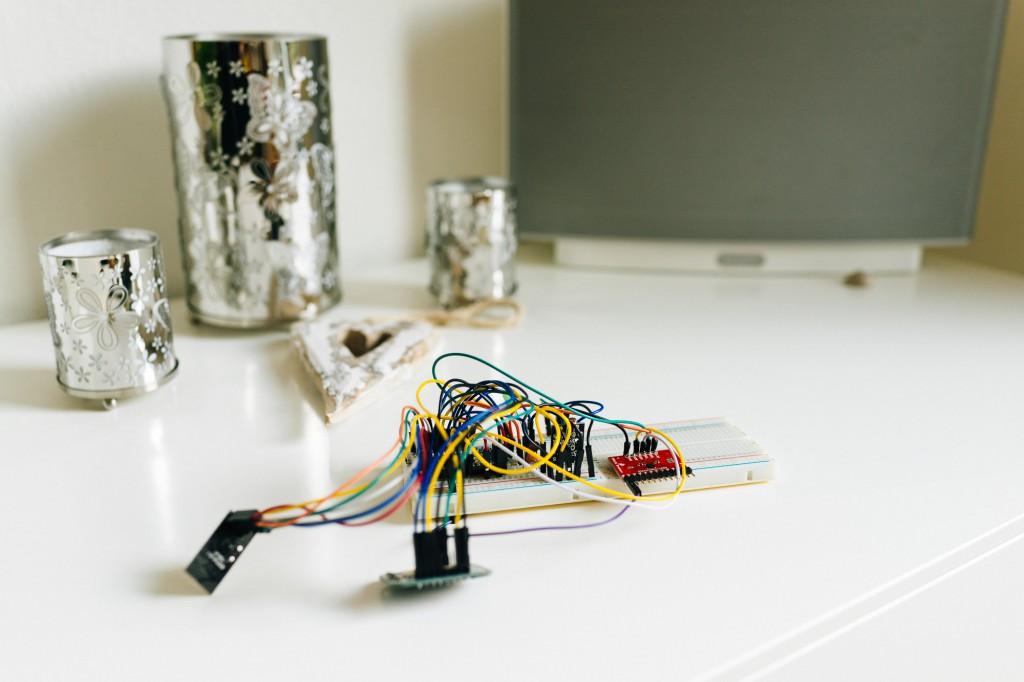
Wireless Node Prototype

There is a lot of buzz around things like “Internet of Things”, “Home Automation”, and “Smart Homes”. One reason for buying into commercial home automation systems is energy savings. At least that is often the main marketing message for commercial products. That is not true, as recent studies found out, and it is not my main motivation to build such a system.

A lot of commercial systems use Bluetooth (Low Energy) Systems zu drive their home automation solutions. You have a device, and an App that is connected to this device to control it. Sometimes, you have an array of devices, that are connected to a hub often with Zigbee based Mesh networks (so your Smartphones App only needs one connection). One example for that is Philips Hue Light System. Apple realized this is a problem as no one wants 10 Apps to control different aspects of their home and introduced HomeKit. While this really sounds interesting on iOS-Controller side, it remains to be seen how this works out on devices and compatibility (and price of course).

When I first got my Philips Hue System I have been impressed and loved it from day one and do so till today. But we have not installed it in every room. And controlling it with your phone is great, but it’s also tedious to pick up your phone to turn on light in a room you are just entering and turning it of when leaving the room. We often end up using the light switches on the wall, which kills that whole Home Automation thing as lights switched off on the wall cannot be turned on again wirelessly.

IFTTT  and Philips Hue: just magic

Things got really interesting when I tested IFTTT.com. What a great service. With “If This Then That” it’s possible to interconnect different web services and trigger actions based on data or triggers of other services. I created a very small receipt turning on my Philips Hue lights at sundown and turns them off at 1 o’clock in the night as a fallback if I just forget to turn lights off when I go to bed.

And it really works well most of the time. And that is really magic. If you have Philips Hue installed. Give it a try. It’s magic. Yesterday I have cooked and thought that it’s about time to turn the lights on, a few seconds later they turned on. Without pressing a key. Without picking my phone. On cloudy days, you sometimes have to turn lights on before sundown, because it’s just kind of dark. This is where large scaled systems like IFTTT have not enough details.

That’s been the moment where I decided to make my own DIY cloud centered, iOS controlled, Arduino based wireless Home Automation System.

(more…)

Read More

Running Node.js on Arduino Yun

Arduino Yun is a great device once you learn how to use it correctly. Microcontrollers like the Atmel-ICs used in all nearly all Arduino compatible devices haven’t a lot of power or memory to Internet-Traffic. Of course they can, there are libraries and modules out there that will transform your little Arduino in a full-fledged Internet of Things device, but you will not have a lot of fun running it.

I.e. a typically RESTFul Web service will deliver so much JSON-Code that even a slightly more complex response will blow the memory of your Arduino.

Arduino Yun, and a few others like DigiX (sold in Germany for example by cboden) or Udoo solve this problem by merging the best of both worlds onto one device. Imaging a Raspberry Pi with an Arduino. If you want to know more about the difference between those two I have a small introduction on both devices.

Arduino Yun packs a full-fledged rather powerful Linux-machine onto an Arduino Leonardo. A so-called bridge allows the Linux part to talk to the sketch, and the sketch is allowed to run the Linux shell. This way you can use everything that has ever been build for Linux, the whole Internet-Stack, and the Arduino Sketch controls all that.

The previous example of running a rather complex RESTFul-Webservice, the sketch would run a Python, PHP, Node.js-Script on the Linux side that will request the data, process them, and delivers back only the really useful things to the micro controller. This way memory is now blown.

Since the latest software-update for Yun (see here on how to update your Yun) you are allowed to run Node.js on the Linux side of your Yun. That way you have a very powerful combination as Node.js is basically exactly build for that: Handling events in a very easy and transparent way. I have never really loved to work in Python, so I have been very pleased to know that I can write my Arduino Internet of Things Code in JavaScript using Node.js.

(more…)

Read More

Arduino vs Raspberry PI

It all started with Chumby One

Being a programmer my whole live, I have never really touched the hardware. I have developed all sorts of Applications, Platforms, web pages, etc. Being fascinated in small and mini computers I found myself buying a Chumby One a few years ago. This rather useless device (for me) launched my interest in small computers and programming them.

The Raspberry PI came into my home

A few month later I bought a Raspberry Pi (Model B) and started developing an interface for my ADF-Scanner. I loved the scanner, but I hated to mount it to my laptop and spending an evening scanning papers coming in the last months. I wanted a solution that runs the scanner and uploads the generated PDF-Documents to my Home Server (QNAP NAS) so I could scan a paper every evening without hooking up USB cables. As a simple user interface I ordered a simple LCD-Screen, hooking it up to the Raspberry PI. I got results, but I really did not like it and it was very unreliable. The Raspi lost WLAN connectivity, crashed or stopped. I think it has been powering issues perhaps now fixed in B+. But even besides that programming the Raspberry PI did not made me happy. Why? Because I had to use the Linux Shell, because all just felt like programming ordinary Computers without learning anything new but being restricted to odd C++ Frameworks, etc… And I did miss my Cocoa Frameworks. When developing rather large scale applications I really miss the clean, fast and reliable Cocoa-APIs  for Mac OS X or iOS Programming. I ended up implementing a small App on my rather old Mac Mini running fine till today.

Anyone else out there who is waiting for a small, cheap ARM-based Apple Device with GPIOs that can be programmed with Cocoa?

Arduino got my heart

A few months ago I discovered Arduino for me. I have heard of it a few times before. But I never really got behind the idea until I took the time to read a few articles about it. For anyone who does not know what Arduino is, I try to sum it up in a few sentences:

Arduino is a convention and a product. The Arduino products are small mini computers based around rather slow Atmel Microprocessors, ranging from 8 MHz around 70 MHz and memory measured in KB and not GB! But it’s also a convention in that everything around Arduino is Open Source and there are a lot of rules all Arduino devices follow – if a device follows there rules it is Arduino compatible and should run everything that has been developed for Arduino before by other groups or person that followed these rules. What makes Arduino even more great is that every schematic is open, so you can build your own Arduino compatible device from scratch if you follow the basic principles defined by Arduino.

(more…)

Read More